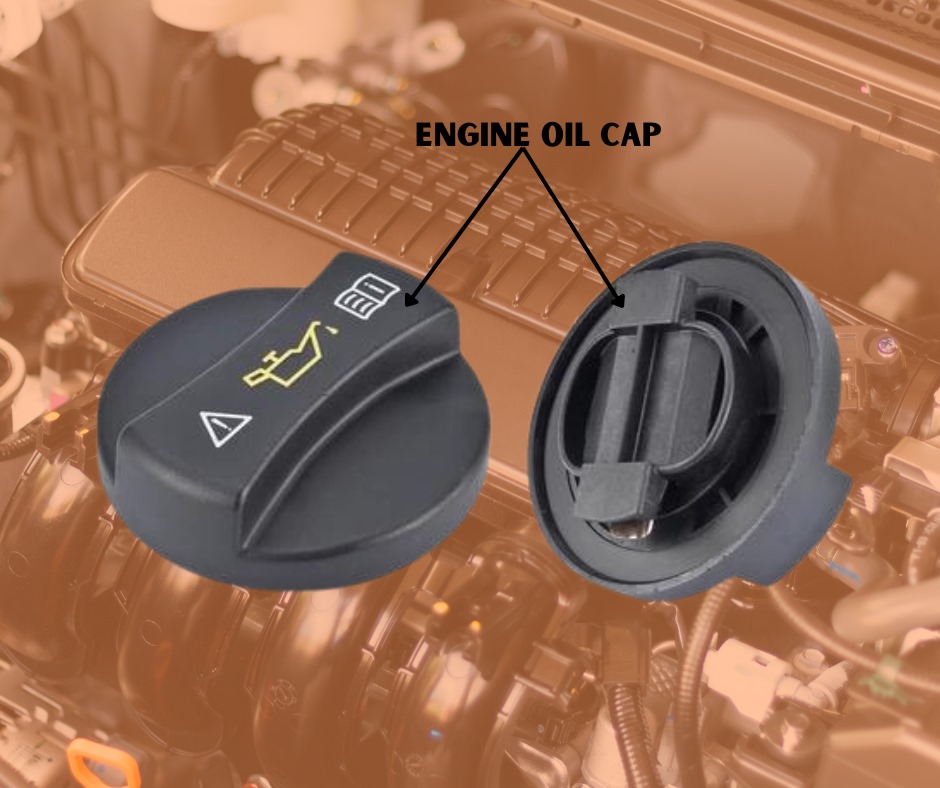
Troubleshooting Common Issues with Oil Tank Caps

Understanding the Role of Oil Tank Caps in Vehicle Performance
Oil tank caps are a critical component in a vehicle's performance, as they seal the oil tank and maintain the correct pressure balance within the engine's oil system. By keeping contaminants out and ensuring no oil leakage, the cap helps to protect engine components from premature wear and corrosion. Furthermore, a functioning cap contributes to maintaining the integrity of the oil, which is essential for lubricating the engine efficiently.
A malfunctioning oil tank cap can cause the 'Check Engine' light to activate, indicating a potential issue with the vehicle’s evaporative emission control system. This can lead to reduced engine performance, increased emissions, and even engine misfires if not addressed promptly.
Common Symptoms of a Faulty Oil Tank Cap
Common symptoms of a faulty oil tank cap include the 'Check Engine' light turning on, a noticeable smell of gasoline or oil around the vehicle, and visible oil leaks or stains under the car. Drivers may also experience a decrease in fuel economy due to the evaporation of fuel. In some cases, a hissing sound may be heard from the oil tank area, indicating a pressure discrepancy.
It's important to inspect the cap for any cracks, damage, or a broken seal as these signs can point to the need for a replacement. Ignoring these symptoms can lead to more severe engine issues and costly repairs.
Step-by-Step Guide to Diagnosing Oil Tank Cap Problems
To diagnose oil tank cap problems, start by visually inspecting the cap for any signs of damage, such as cracks or a deteriorated seal. Next, ensure that the cap is tightened correctly; a loose cap can cause similar symptoms to a damaged one. If the cap is damaged or not sealing properly, try replacing it with a new one and clear any error codes from the vehicle's computer to see if the issue is resolved.
If the problem persists after replacing the cap, it may be necessary to investigate further for any additional issues within the evaporative emissions system or the oil tank itself. A professional diagnostic tool or a visit to a mechanic may be required to pinpoint the exact cause of the problem.
Effective Solutions for Repairing or Replacing Your Oil Tank Cap
The simplest solution for a faulty oil tank cap is to replace it with a new one that meets the manufacturer's specifications. It is essential to choose the correct cap for your vehicle model to ensure a proper fit and seal. For minor issues such as a dirty or sticky cap, cleaning it thoroughly with an appropriate cleaner can sometimes restore its function. However, if the cap is cracked or the seal is compromised, replacement is the only viable solution.
When installing a new oil tank cap, make sure it's securely fastened and clicks into place, indicating a proper seal. Regularly check the cap for wear and tear as part of routine vehicle maintenance to avoid future issues.
Preventative Measures to Avoid Future Oil Tank Cap Issues
To prevent future oil tank cap issues, regularly inspect the cap for any signs of wear or damage as part of your vehicle's maintenance routine. Ensure that the cap is always correctly tightened after refueling. Avoid over-tightening, as this can cause the cap to wear out prematurely. Consider replacing the oil tank cap every few years, even if no immediate issues are evident, as a preventative measure.
Additionally, keep the area around the oil tank cap clean from debris and dust that could compromise the seal. If you live in an area with extreme temperatures, check the cap more frequently, as temperature fluctuations can cause the material of the cap to expand and contract, leading to potential issues over time.
Drop us a message from our facebook page or Chat us using the widget on the right to order an Oil tank cap for your car.

 Loading..